- Published on
Joplin Note Pad
- Authors
- Name
- Rusty Yow


I just wanted to share my experiece with Joplin note editor. Only been using it for about a week now but it beats what I was using before which was Obsidian. Obsidian works great as well but they charge for note syncing and do not have the option to host your own AWS S3 bucket for your note syncing. Below are the steps I took to create this bucket and start syncing my notes.
Create Bucket
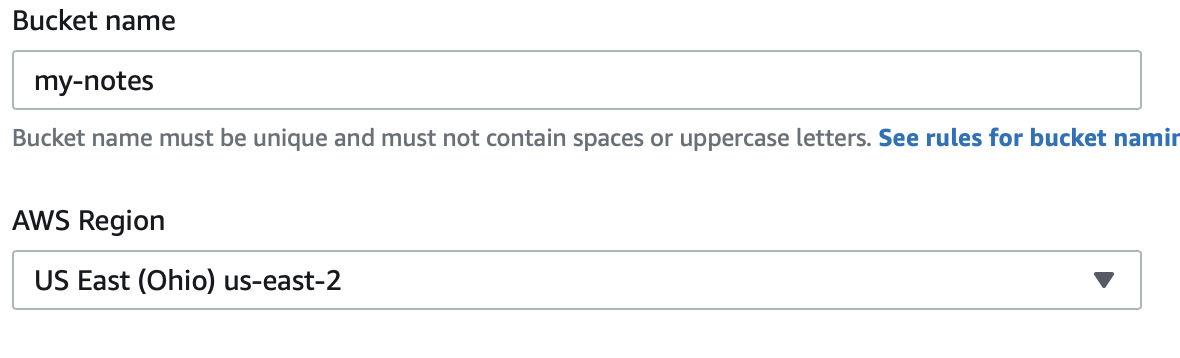
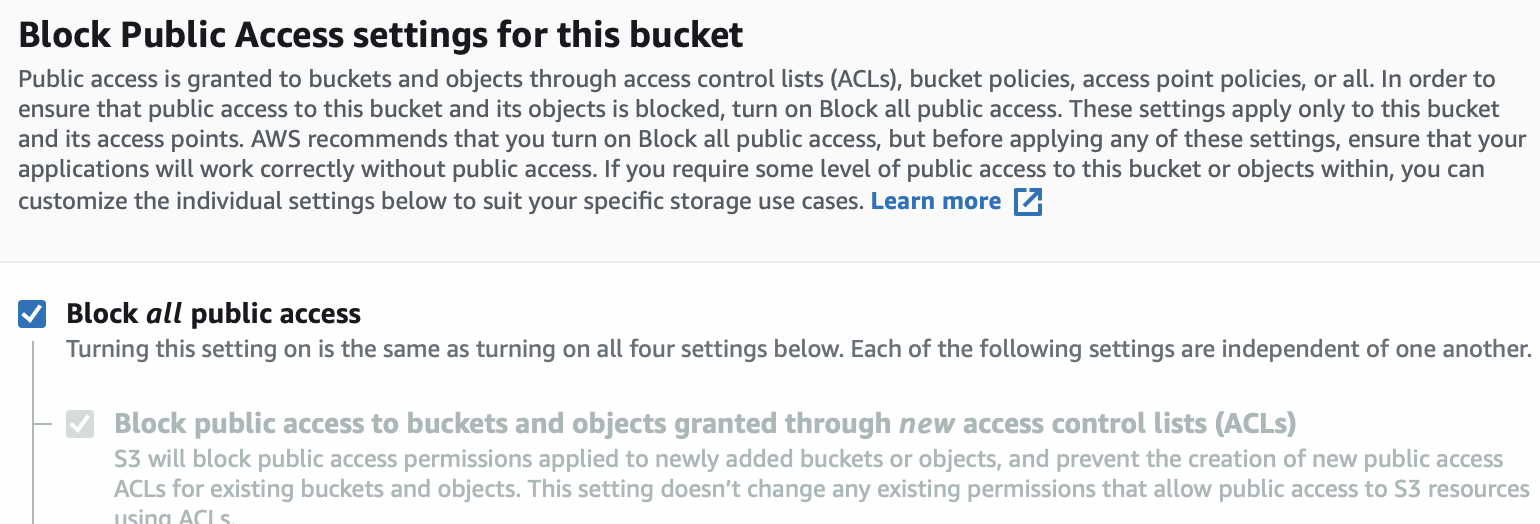
First create an S3 bucket with a unique name. Be sure to turn on the "block all public access". Also turn off “Bucket Versioning” as I belive Joplin has versioning history built in.


I would turn on default encryption as well.
IAM Policy Creation
Go into the IAM settings for AWS. Create a new policy.
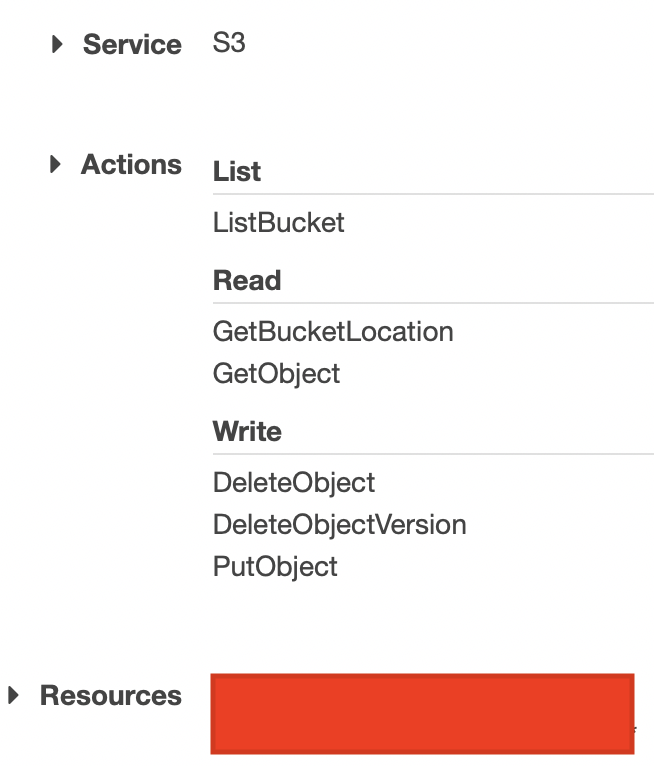
- Click “Service” and select “S3”
Under Actions
- Under “List” select “ListBucket”
- Under “Read” select “GetBucketLocation” and “GetObject”
- Under “Write” select “DeleteObject”, “DeleteObjectVersion” and “PutObject”
Under Resources
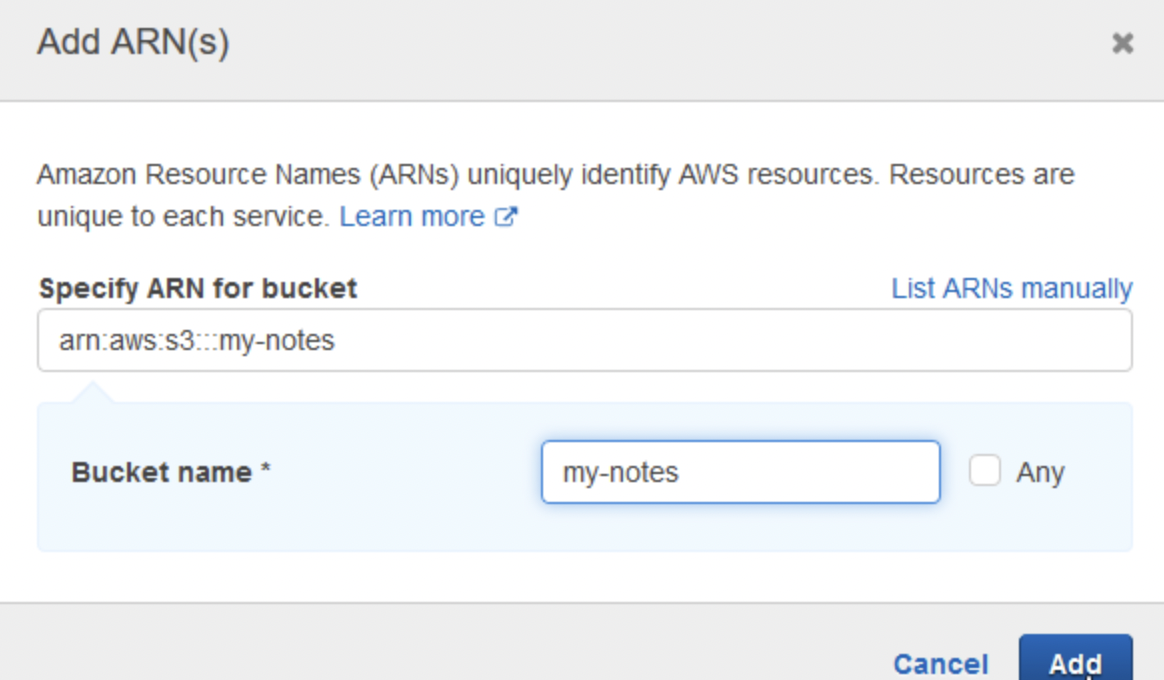
- Select “Specific” as the type of resource
- Click “Add ARN” for bucket
- Type in your bucket name in the “Bucket name” field and click “Add”
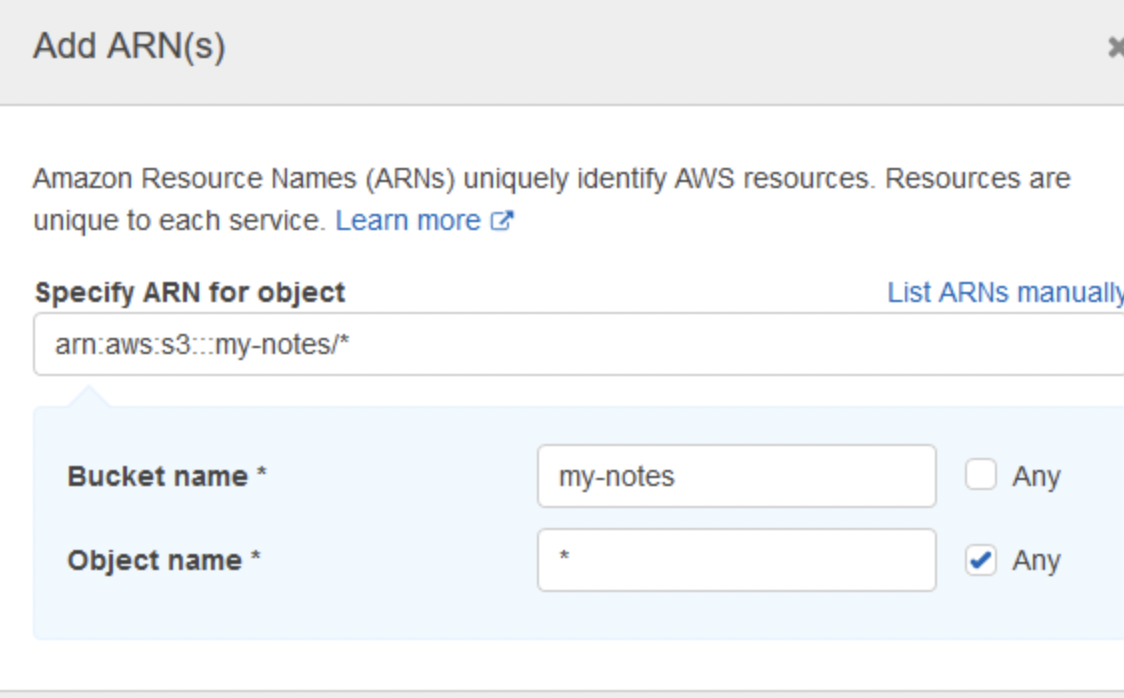
- Click “Add ARN” for object
- Type in your bucket name in the “Bucket name” field like the previous step
- Tick the “Any” button under “Object name” and click “Add”

Next add arn for bucket.

Then add arn for object.

Once these steps are completed click review policy and give it a name such as joplin-my-notes-policy and click create.
Create IAM Users
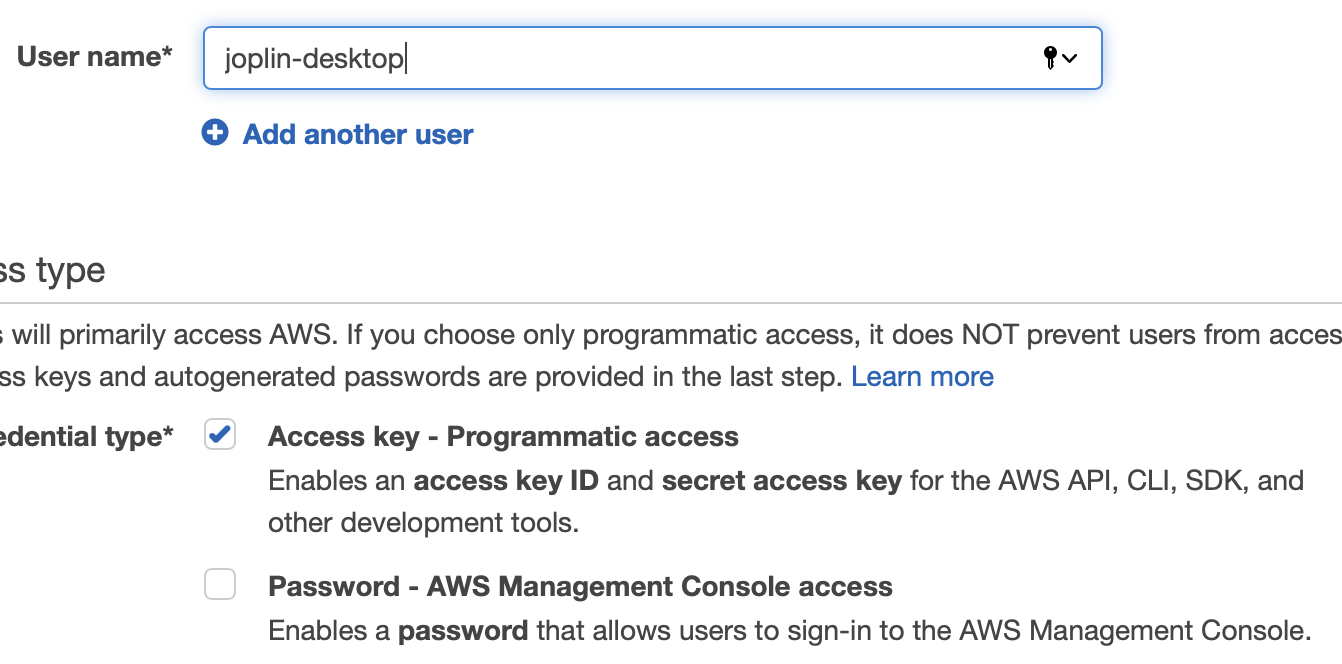
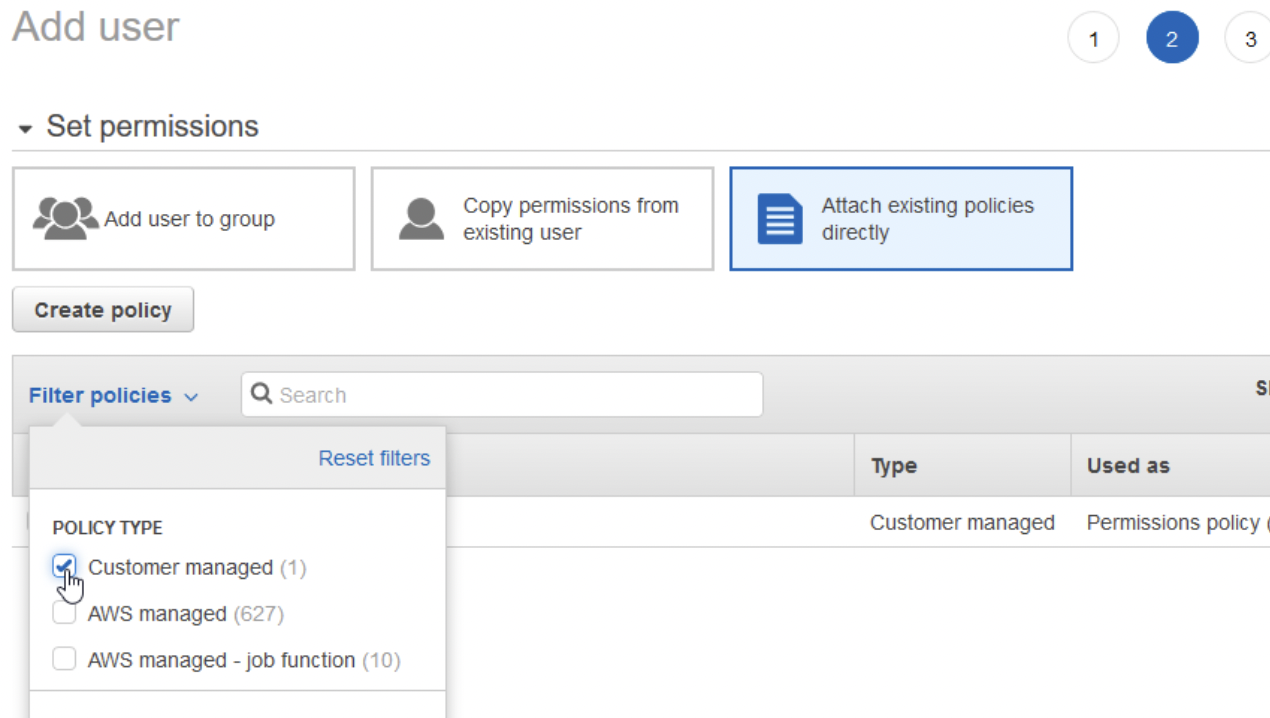
Goto IAM settings again and click on users on the left side. Then click the "add user" button. Name this user after the device you are going to be using it on. For example: "joplin-desktop". Check the box "Programmatic access".

From here you need to add the policy you just created to your user. Click “Attach existing policies directly” at the top then click “Filter policies” and select “Customer managed”.

Your custom policy from before should be listed and from there you can select it and click “Next” at the bottom. From here you can click “Next”, “Review” and then “Create user”. Once the user has been created your credentials (Access key ID and Secret access key) will be listed.
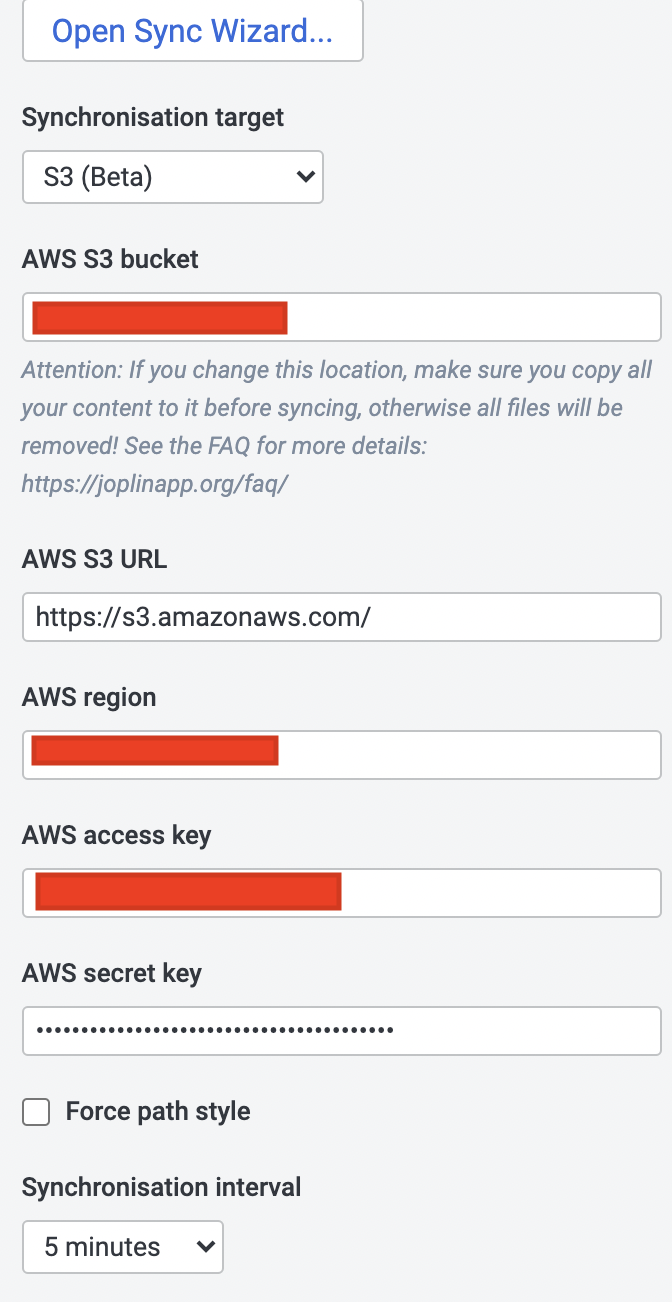
Sync Settings In Joplin
You should have everything you need now to Joplin to your S3 bucket for synchronisation. Go into your Joplin settings and fill in the correct info given from your user you created.
You should create another user the same way if you want to use synchronisation on your ipad, or phone as well. Each device would be more secure to have its own user, just follow the same steps above for creating IAM users.